
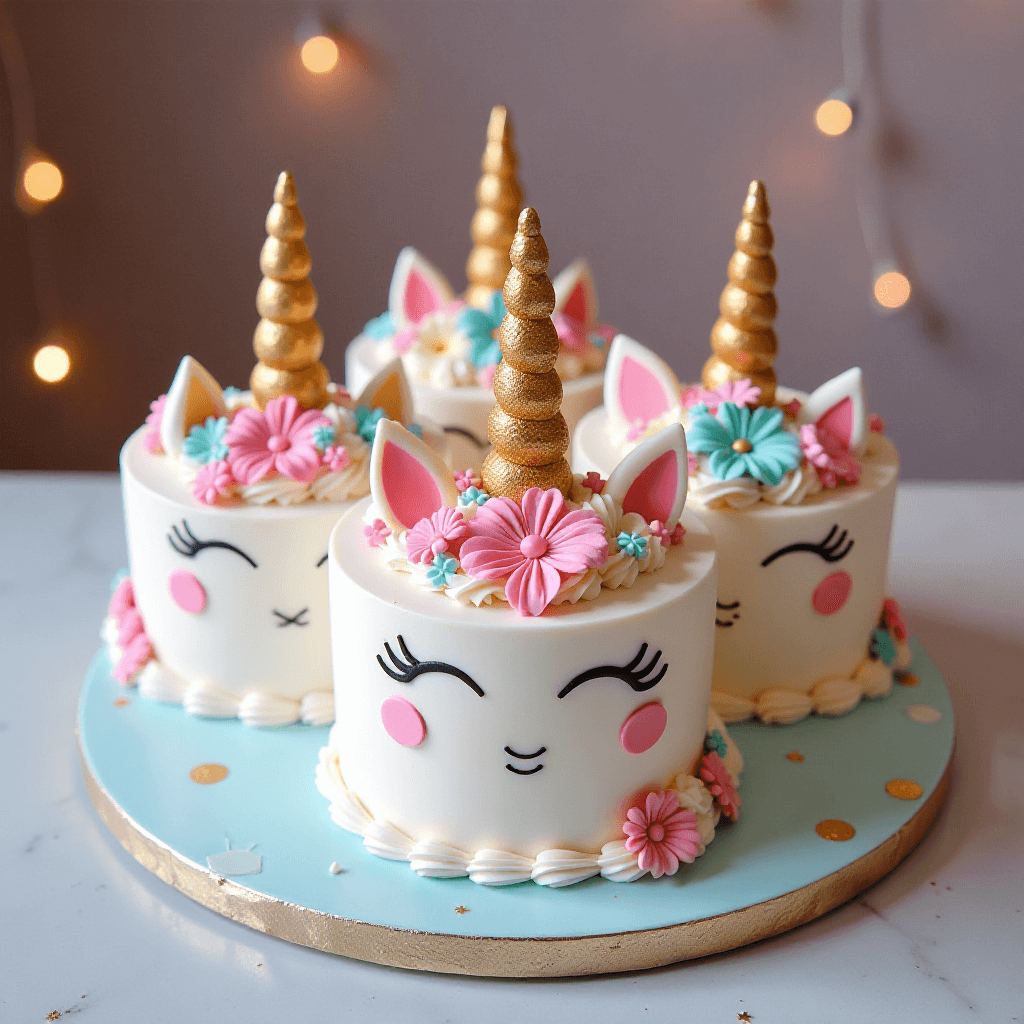
Unicorn cakes have taken the baking world by storm, captivating hearts with their magical, whimsical appeal. Perfect for birthdays, celebrations, or any occasion that calls for a touch of fantasy, these colorful confections are as fun to create as they are to eat. With pastel layers, shimmering sprinkles, and a majestic horn on top, a unicorn cake isn’t just dessert—it’s a centerpiece that sparks joy.
In this guide, we’ll walk you through everything you need to know to make the perfect unicorn cake at home. Whether you’re a baking pro or a complete beginner, you’ll find tips, techniques, and creative ideas to craft a cake that looks straight out of a fairytale. Let’s dive into this enchanting baking adventure!
What You Need to Make a Unicorn Cake
Making a unicorn cake requires careful planning and the right supplies. Below, we provide a comprehensive breakdown of the essential ingredients, tools, and decorations needed to create a cake that’s both magical and delicious.
Ingredients Checklist
The foundation of a unicorn cake is a fluffy, moist cake base, paired with eye-catching decorations. Here’s what you’ll need:
- Basic Baking Ingredients:
- Flour: Use all-purpose or cake flour for a tender crumb. Cake flour will give a softer, more delicate texture.
- Sugar: Granulated sugar for sweetness and texture.
- Butter or Oil: Butter provides richness, while oil helps keep the cake moist.
- Eggs: Necessary for structure and fluffiness.
- Baking Powder/Baking Soda: Leavening agents to make the cake rise.
- Milk or Buttermilk: Adds moisture and enhances the cake’s flavor.
- Vanilla Extract: For a classic cake flavor.
- Food Coloring:
- Gel food coloring is preferred for vibrant hues without thinning the batter.
- Choose pastel shades like pink, blue, purple, and yellow for the signature unicorn look.
- Frosting and Fillings:
- Buttercream Frosting: A versatile frosting for both crumb coating and decorating.
- Optional Fillings: Jam, ganache, or fruit preserves for added flavor between layers.
- Decorative Ingredients:
- Fondant or Gum Paste: Essential for creating the horn, ears, and other details.
- Edible Glitter and Sprinkles: Adds sparkle and whimsy to the cake.
- Gold Leaf or Metallic Edible Paint: Perfect for creating a shiny, magical horn.
Tools You’ll Need
Having the right tools can make the cake assembly and decorating process much easier and more enjoyable.
- Baking Equipment:
- Cake Pans: Use round pans, typically 6 or 8 inches, for even layers.
- Mixing Bowls and Electric Mixer: Necessary for making batter and frosting.
- Decorating Tools:
- Piping Bags and Tips: Essential for creating buttercream swirls, rosettes, and the unicorn mane.
- Offset Spatula: Helps spread frosting evenly.
- Turntable: Allows you to rotate the cake while decorating for smooth results.
- Bench Scraper: Ensures sharp, clean edges on frosted cakes.
- Specialty Tools:
- Fondant Tools: Sculpting tools for shaping the horn, ears, and fine details.
- Edible Glitter Brush: For applying glitter or metallic paint.
Choosing Your Decorations
The decorations are the heart of the unicorn cake’s charm. Here are some suggestions to make your cake stand out:
- Unicorn Horn and Ears:
- Sculpt these from fondant or gum paste and paint them with gold or metallic edible paint.
- You can also use store-bought toppers if time is limited.
- Buttercream Mane:
- Use multiple piping bags filled with pastel-colored buttercream.
- Create rosettes, swirls, and stars for a flowing, magical mane.
- Sprinkles and Glitter:
- Use pastel sprinkles for a playful touch.
- Edible glitter adds sparkle, making the cake feel extra special.
- Optional Add-Ons:
- Edible flowers for elegance.
- Candy pearls or stars for extra detail.
- Personalized toppers to suit the occasion.
By gathering these ingredients, tools, and decorations, you’ll have everything you need to create a unicorn cake that’s as beautiful as it is delicious. Preparation is key, so take your time assembling your materials before starting. Let your creativity shine and enjoy the process!
Preparing the Perfect Cake Base
A unicorn cake starts with a flawless cake base that’s moist, fluffy, and flavorful. Follow these steps and tips to create a base that’s both delicious and sturdy enough for decorating.
Choosing the Right Recipe
The foundation of a perfect cake lies in selecting the right recipe. Here are some popular options:
- Vanilla Cake: A classic choice that complements colorful decorations and any frosting flavor.
- Chocolate Cake: For those who want a rich, decadent flavor.
- Funfetti Cake: A playful option with colorful sprinkles baked into the batter, ideal for unicorn themes.
If you’re making a layered cake, choose a recipe with a firm yet moist texture to support the weight of the decorations.
Preparing the Ingredients
Proper preparation ensures a smooth baking process:
- Room Temperature Ingredients: Bring butter, eggs, and milk to room temperature to ensure a smooth batter and even mixing.
- Measuring Accurately: Use a kitchen scale or measuring cups to get precise ingredient quantities, which is crucial for baking success.
- Sifting Dry Ingredients: Sift flour, baking powder, and cocoa powder (if using) to eliminate lumps and create a light texture.
Mixing the Batter
The mixing process is key to achieving a fluffy, tender cake base:
- Creaming Butter and Sugar: Beat butter and sugar together until light and fluffy; this adds air to the batter for a soft texture.
- Adding Eggs Gradually: Incorporate eggs one at a time to prevent curdling and ensure even mixing.
- Alternating Wet and Dry Ingredients: Add flour mixture and milk alternately, starting and ending with the dry ingredients to avoid overmixing.
Adding Colors for a Unicorn Theme
To achieve the iconic pastel or rainbow layers:
- Dividing the Batter: Separate the batter into equal portions based on the number of colors you want.
- Using Gel Food Coloring: Add a few drops of gel-based food coloring to each portion and mix gently until the desired shade is reached. Gel colors are more vibrant and won’t thin the batter.
Pro Tip: For a true rainbow effect, layer the colors carefully in the pan, or bake each color layer separately.
Baking the Cake Layers
Follow these tips for even, perfectly baked layers:
- Prepping the Pans: Grease and line cake pans with parchment paper to prevent sticking.
- Filling the Pans Evenly: Use a kitchen scale to divide the batter equally for uniform layers.
- Baking Time and Temperature: Bake at the temperature specified in your recipe, and rotate the pans halfway through for even cooking.
- Testing for Doneness: Insert a toothpick in the center of the cake; it should come out clean or with a few crumbs.
Cooling and Trimming
Proper cooling and trimming are crucial for assembling the cake:
- Cooling the Layers: Let the cakes cool in their pans for 10-15 minutes, then transfer them to a wire rack to cool completely.
- Leveling the Layers: Use a serrated knife or a cake leveler to trim the tops of each layer, ensuring a flat, even surface for stacking.
By following these steps, you’ll create a cake base that’s light, flavorful, and ready for the magical unicorn transformation. A well-prepared base is the secret to a show-stopping final cake, so take your time and enjoy the process!
Assembling and Decorating the Unicorn Cake
The assembly and decoration are where your unicorn cake comes to life. With a combination of colorful frosting, intricate details, and whimsical toppers, you can transform simple cake layers into a magical centerpiece. Follow these steps for flawless assembly and decoration.
Preparing the Layers for Assembly
Before you start stacking, it’s essential to ensure the cake layers are ready:
- Trim and Level the Layers: Use a serrated knife or cake leveler to remove any domed tops, creating flat, even layers that stack neatly.
- Chill the Layers: Chilling the layers in the refrigerator for 30 minutes makes them easier to handle and reduces crumbs during frosting.
Crumb Coating the Cake
A crumb coat is a thin layer of frosting applied to seal in crumbs and create a smooth base for the final layer of frosting.
- Apply a Thin Layer of Frosting: Use an offset spatula to spread a thin layer of frosting over the entire cake.
- Smooth the Surface: Use a bench scraper to even out the frosting and remove excess.
- Chill the Cake: Refrigerate for 20-30 minutes to set the crumb coat before adding the final layer.
Frosting the Cake
The final frosting layer is your canvas for decorating:
- Choose Your Frosting: Buttercream is ideal for its smooth texture and ability to hold shape for piping.
- Apply the Final Coat: Spread a thicker layer of frosting over the cake using an offset spatula, and smooth it with a bench scraper for a polished look.
- Optional Gradient Effect: Create an ombre or rainbow effect by using different colors of frosting and blending them together.
Creating the Unicorn Mane
The mane is one of the most striking features of a unicorn cake, made with colorful buttercream swirls.
- Prepare Piping Bags: Fill piping bags with different pastel-colored buttercreams. Use star and round tips for variety.
- Pipe the Mane: Start at the top of the cake, piping rosettes, swirls, and stars to form a flowing mane that cascades down one side.
- Add Details: Sprinkle edible glitter, candy pearls, or stars over the mane for added sparkle.
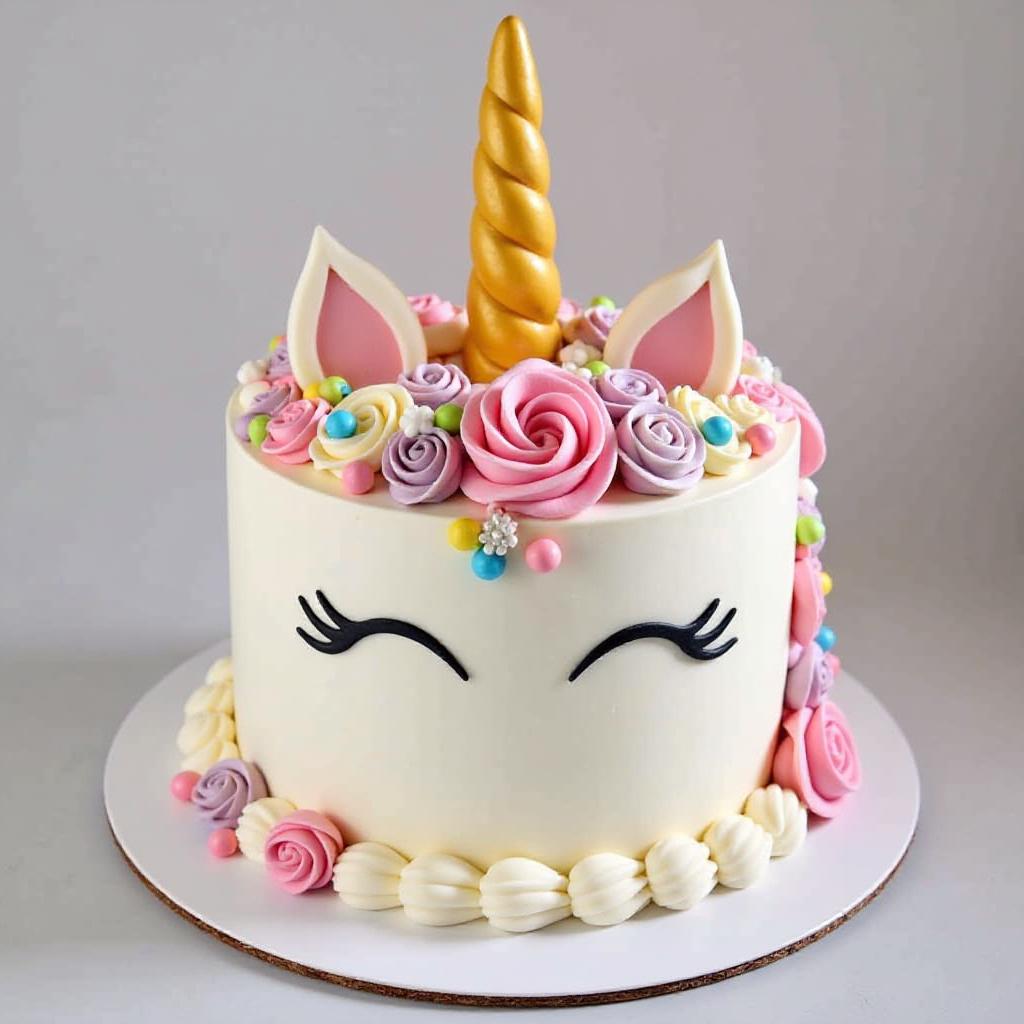
Adding the Unicorn Features
The horn, ears, and eyes give the cake its magical personality:
- Unicorn Horn: Shape the horn using fondant or gum paste, roll it into a spiral, and paint it with edible gold or silver paint. Insert it into the top of the cake securely.
- Ears: Cut ear shapes from fondant or gum paste, add an inner pink or gold accent, and place them next to the horn.
- Eyes: Use black fondant or piped buttercream to create closed eyes with long, curved lashes for a dreamy look.
Final Touches and Decorations
Enhance your unicorn cake with these finishing touches:
- Sprinkles and Edible Glitter: Scatter pastel sprinkles or edible glitter around the base and mane for a playful touch.
- Edible Flowers: Add elegance with small, edible flowers arranged around the cake.
- Personalized Elements: Include a custom message or name using fondant or piping for a personal touch.
Presentation and Serving Tips
After decorating, it’s time to prepare your cake for presentation:
- Chill Before Serving: Refrigerate the cake for 15-20 minutes to set the frosting and decorations.
- Slice with Care: Use a sharp, clean knife for neat slices to showcase the colorful layers.
- Capture the Moment: Take photos of your stunning creation before serving—your unicorn cake is a work of art!
By following these steps, you’ll assemble and decorate a unicorn cake that’s not only visually stunning but also sure to delight anyone who sees or tastes it. Let your creativity shine, and have fun bringing this magical masterpiece to life!
Expert Tips for Unicorn Cake Success
Crafting a unicorn cake that looks and tastes amazing requires attention to detail and a few pro techniques. These expert tips will help you avoid common pitfalls and elevate your cake to a professional level.
Planning Ahead
Creating a unicorn cake is a multi-step process, so planning is crucial:
- Schedule Your Tasks: Break down the process into manageable steps. For example, bake the cake layers one day, and decorate the next.
- Prepare Ingredients in Advance: Measure and prepare all ingredients before starting to save time and reduce stress.
- Test New Techniques: If you’re trying a new piping style or decoration, practice on parchment paper or a flat surface first.
Working with Fondant and Gum Paste
Fondant and gum paste are essential for creating the unicorn horn, ears, and other decorative details. Here’s how to work with them like a pro:
- Knead Thoroughly: Knead fondant or gum paste until it’s smooth and pliable to avoid cracks when shaping.
- Use Cornstarch or Shortening: Prevent sticking by dusting your surface with cornstarch or greasing your hands with shortening.
- Craft Details Early: Make the horn, ears, and eyes a day in advance to allow them to dry and harden for easy placement.
Piping Buttercream Mane Like a Pro
The buttercream mane is the centerpiece of the unicorn cake, so take your time to perfect it:
- Choose the Right Tips: Use star tips (#1M or #2D) for rosettes and round tips for dots and lines.
- Color Coordination: Use pastel colors that complement each other. Fill separate piping bags for each color or combine them in one bag for a swirl effect.
- Practice Piping: Before decorating the cake, practice piping swirls, rosettes, and stars on a plate or parchment paper.
Achieving Smooth Frosting
Smooth frosting provides a clean canvas for decorating:
- Crumb Coat First: Always apply a thin crumb coat to lock in crumbs before the final layer of frosting.
- Use a Turntable: Rotate the cake while smoothing frosting with a bench scraper for even coverage.
- Chill Between Layers: Chill the cake for 15-20 minutes between coats of frosting to prevent smudging and ensure stability.
Troubleshooting Common Problems
Avoid these common issues with these solutions:
- Uneven Layers: Trim domed tops with a serrated knife for flat, stackable layers.
- Soft Fondant: If fondant is too soft, knead in a small amount of powdered sugar to firm it up.
- Melting Buttercream: If the buttercream becomes too soft, refrigerate it for 10-15 minutes to firm up before piping.
- Colors Bleeding: Use gel food coloring instead of liquid to prevent bleeding and maintain vibrant hues.
Enhancing Visual Appeal
Make your unicorn cake stand out with these creative touches:
- Gold or Metallic Accents: Paint the horn and ears with edible gold or silver paint for a luxurious finish.
- Add Texture: Use textured mats or tools on fondant for unique designs.
- Incorporate Edible Glitter: Dust glitter over the mane and decorations for a sparkling, magical effect.
- Balance Decorations: Avoid overcrowding the cake; a few well-placed details will have a greater impact.
Storage and Serving Tips
Keep your cake fresh and beautiful until it’s time to serve:
- Refrigeration: Store the cake in the refrigerator if it won’t be served immediately. Bring it to room temperature before serving for the best flavor and texture.
- Transport Safely: If transporting the cake, use a sturdy cake box and secure the cake to prevent shifting.
- Clean Slicing: Use a sharp, warm knife for clean slices that showcase the colorful layers. Wipe the knife between cuts for neat results.
By incorporating these expert tips into your process, you’ll create a unicorn cake that’s not only visually stunning but also structurally sound and absolutely delicious. With practice and patience, you’ll master the art of unicorn cake baking and decorating!
Frequently Asked Questions About Unicorn Cakes
Creating a unicorn cake can seem daunting, especially for beginners. Below, we address some of the most common questions to help you navigate the process with ease and confidence.
What Type of Cake is Best for a Unicorn Cake?
A sturdy yet moist cake is ideal for a unicorn cake since it needs to support multiple layers and decorations.
- Vanilla or Funfetti Cakes: These are popular choices because they provide a neutral flavor that pairs well with colorful decorations.
- Chocolate Cake: A rich and decadent option that’s great for chocolate lovers.
- Butter Cake or Pound Cake: These have a denser texture, making them ideal for layered designs.
Pro Tip: Avoid overly soft or crumbly cakes, as they can be challenging to stack and frost.
How Do I Get Vibrant Colors Without Affecting the Flavor?
Achieving vibrant colors is essential for a unicorn cake, and using the right coloring techniques ensures great results:
- Gel Food Coloring: Preferred over liquid food coloring as it provides intense colors without thinning the batter or frosting.
- Powdered Food Coloring: Another great option for achieving bold hues without altering the consistency.
- Mixing Colors: For unique shades, combine colors carefully. For example, mix pink and yellow to create a peachy tone.
Can I Make a Unicorn Cake Without Fondant?
Yes, you can make a beautiful unicorn cake without using fondant.
- Buttercream Decorations: Use piped buttercream for the mane and details.
- Candy Horn and Ears: Replace fondant features with candy or chocolate molds.
- Edible Toppers: Pre-made edible toppers are a quick and easy alternative.
How Far in Advance Can I Make a Unicorn Cake?
You can prepare different components of the unicorn cake in advance to save time:
- Cake Layers: Bake the layers up to two days in advance and store them in an airtight container or wrap them in plastic wrap.
- Fondant Decorations: Create the horn, ears, and other details several days in advance to allow them to dry completely.
- Assembling and Frosting: Assemble and frost the cake the day before serving for optimal freshness.
How Do I Prevent My Buttercream From Melting While Decorating?
Buttercream can become soft and challenging to work with, especially in warm conditions:
- Keep It Cool: Chill the buttercream slightly before using it, but ensure it’s still pliable for piping.
- Work in a Cool Environment: Try to decorate in a room with air conditioning or good ventilation.
- Use Stabilizers: Add a small amount of cornstarch or powdered sugar to stabilize the buttercream.
What’s the Easiest Way to Make the Unicorn Horn?
The unicorn horn is a defining feature of the cake, and here’s how to make it effortlessly:
- Fondant or Gum Paste: Roll two thin ropes of fondant, twist them together into a spiral, and secure them with water or edible glue. Paint with edible gold or silver.
- Candy Horn: Melt white chocolate, pour it into a horn-shaped mold, and let it harden before painting it.
- Pre-Made Toppers: If short on time, purchase a pre-made unicorn horn topper from a cake supply store.
Can I Make a Mini Unicorn Cake Instead of a Full-Sized One?
Yes! Mini unicorn cakes are adorable and perfect for smaller gatherings or individual servings:
- Use Smaller Pans: Bake the cake in 4-inch pans for petite layers.
- Individual Cupcakes: Turn the design into unicorn cupcakes, with a horn and mane piped on each one.
- Decorating Mini Cakes: The same techniques apply but on a smaller scale. Use smaller piping tips for finer details.
How Do I Ensure the Cake Layers Stay Stable While Stacking?
Stacking cake layers can be tricky, but these tips will help:
- Level the Layers: Ensure all layers are flat and even before stacking.
- Use Support: For tall cakes, insert wooden or plastic dowels into the base layers to prevent collapsing.
- Chill the Cake: Refrigerate the cake between stacking and decorating to help it firm up.
What’s the Best Way to Transport a Unicorn Cake?
Transporting a decorated unicorn cake requires care:
- Use a Cake Box: Place the cake in a sturdy cake box to protect it from dust and damage.
- Secure the Cake: Use a non-slip mat or tape under the cake board to keep it stable during transport.
- Temperature Control: Avoid exposing the cake to direct sunlight or high temperatures during transit.
Can I Customize My Unicorn Cake for Different Occasions?
Absolutely! Unicorn cakes are highly versatile and can be tailored to fit various themes:
- Holiday Themes: Add red and green for Christmas or pastel eggs for Easter.
- Birthday Personalization: Incorporate the birthday person’s favorite colors or a custom topper with their name.
- Themed Events: Adjust the colors and decorations to match party themes, like mermaids or princesses.
By addressing these frequently asked questions, you’ll be equipped with the knowledge and confidence to create a stunning unicorn cake. Whether you’re a beginner or an experienced baker, these insights will help you tackle challenges and enjoy the process of making this magical dessert!
Conclusion
Creating a unicorn cake is more than just baking a dessert; it’s about crafting a magical centerpiece that brings joy and wonder to any occasion. From the vibrant colors of the buttercream mane to the glimmering unicorn horn, every element contributes to its whimsical charm. Whether you’re making this cake for a child’s birthday, a themed party, or simply as a creative baking project, the result is sure to leave everyone in awe.
Key Takeaways
- Plan and Prepare: Success begins with careful planning. Organize your ingredients, tools, and timeline to make the process smooth and enjoyable.
- Embrace Creativity: A unicorn cake is a blank canvas for your imagination. Don’t be afraid to experiment with colors, textures, and decorations.
- Focus on Details: Small touches, like the perfect horn or glitter accents, elevate your cake from ordinary to extraordinary.
Encouragement for Beginners
If this is your first time making a unicorn cake, remember that perfection isn’t the goal—creating something fun and meaningful is. Each attempt helps you learn and improve your skills. Celebrate your progress and enjoy the process of bringing your vision to life.
The Joy of Sharing
Unicorn cakes aren’t just a treat for the eyes; they’re a delight to share with friends and family. Cutting into the colorful layers and seeing the reactions of loved ones makes the effort worthwhile. Whether it’s the laughter at a whimsical design or the admiration for your hard work, the memories you create are as sweet as the cake itself.
Inspiration to Keep Baking
Let this unicorn cake be the start of your baking journey. There’s always another occasion to bake, decorate, and explore new designs. With each project, you’ll develop new techniques and discover the limitless possibilities of baking artistry.
In conclusion, a unicorn cake is more than just a dessert : it’s a symbol of joy, creativity, and celebration. So gather your ingredients, unleash your imagination, and let the magic unfold in your kitchen. The smiles and amazement it brings will make all your efforts truly worthwhile!