
If you’ve ever dreamed of making restaurant-quality pizza at home, the secret lies in the dough. A well-made pizza dough, especially when made in a bread machine, sets the foundation for a delicious crust—crispy on the outside, soft and chewy on the inside. But making pizza dough from scratch can seem intimidating, especially if you’re not confident in your kneading skills. That’s where a bread machine comes to the rescue!
With a bread machine, creating the perfect pizza dough becomes a hassle-free, foolproof process. Whether you’re a seasoned baker or a complete beginner, this guide will walk you through everything you need to know about making pizza dough with your bread machine. From choosing the right ingredients to troubleshooting common issues, we’ve got you covered. Get ready to enjoy a homemade pizza crust that’s better than takeout—fresh, flavorful, and uniquely yours.
Why Use a Bread Machine for Pizza Dough?
Using a bread machine to prepare pizza dough offers numerous advantages, making it a go-to choice for both beginner and experienced bakers. Here’s why a bread machine can transform your pizza-making experience:
Convenience and Time-Saving
One of the biggest advantages of a bread machine is the convenience it offers:
- Hands-Free Process: Simply add the ingredients, select the dough cycle, and let the machine handle the mixing, kneading, and proofing.
- Time Efficiency: While the machine does its work, you can focus on preparing toppings or other tasks, saving valuable time in the kitchen.
- Consistent Workflow: No need to worry about manually monitoring kneading times or proofing stages; the machine ensures everything is done correctly.
Consistent and Reliable Results
Bread machines are designed to create evenly mixed and kneaded dough:
- Even Kneading: The machine’s paddles knead the dough uniformly, resulting in a smooth texture and consistent elasticity.
- Perfect Proofing Conditions: Bread machines provide a warm environment ideal for dough to rise, leading to a fluffy and airy crust.
- No Guesswork: By automating the process, a bread machine eliminates common errors that can occur when making dough manually.
Ideal for Beginners
For those new to baking, a bread machine simplifies the process:
- User-Friendly: Most machines have intuitive settings specifically for dough, making it easy for anyone to get started.
- Confidence Boost: Beginners can achieve professional-quality dough without prior experience, building confidence to explore more complex recipes.
- Learning Tool: Using a bread machine helps novice bakers understand the stages of dough preparation, such as mixing, kneading, and proofing.
Versatility for Different Pizza Styles
A bread machine allows you to experiment with various pizza styles:
- Thin Crust: Achieve a light and crispy base for classic pizzas.
- Thick Crust: Create a hearty and chewy foundation for deep-dish or pan pizzas.
- Specialty Doughs: Incorporate herbs, garlic, or cheese directly into the dough for added flavor and variety.
Effortless Customization
Bread machines enable you to customize your pizza dough to suit your preferences:
- Ingredient Control: Adjust the amount of salt, sugar, or oil to create the desired texture and flavor.
- Dietary Options: Easily make gluten-free, whole wheat, or vegan pizza dough with the right recipe and machine settings.
- Personalized Touch: Experiment with unique ingredients, such as infused oils or specialty flours, to make the dough your own.
Less Mess, Less Stress
Making dough manually can leave your kitchen covered in flour and dough bits. A bread machine helps keep things clean:
- Self-Contained Mixing: All the action happens inside the machine, minimizing spills and mess.
- Easy Cleanup: Most bread machine pans and paddles are non-stick and dishwasher-safe, simplifying cleanup.
Perfect for Busy Lifestyles
For those juggling busy schedules, a bread machine is a lifesaver:
- Set It and Forget It: Add the ingredients, set the timer, and return to perfectly prepared dough.
- Prep Ahead: Some machines have a delay start feature, allowing you to prepare dough in advance and have it ready exactly when you need it.
By using a bread machine, you can take the guesswork and hassle out of pizza dough preparation, making it a straightforward and enjoyable process. Whether you’re looking for convenience, consistency, or the ability to experiment with different styles, a bread machine is an invaluable tool for creating the perfect pizza crust every time.
Ingredients for the Perfect Pizza Dough
The foundation of any great pizza lies in its dough, and using high-quality ingredients is key to achieving the perfect texture and flavor. Here’s a detailed look at the essential and optional ingredients that will elevate your pizza dough.
Essential Ingredients
a. Flour
- All-Purpose Flour: Versatile and widely available, this is a good choice for beginners and yields a soft, slightly chewy crust.
- Bread Flour: With higher protein content, bread flour creates a dough with more elasticity and a chewier texture, perfect for pizza lovers.
- Gluten-Free Flour: For those with dietary restrictions, gluten-free flour blends can be used to create an excellent alternative dough.
b. Water
- The right amount of water hydrates the flour and activates the gluten, giving the dough its structure.
- Use lukewarm water (around 100°F or 38°C) to help activate the yeast effectively.
c. Yeast
- Active Dry Yeast: Needs to be dissolved in water before adding to the dough, offering reliable rising power.
- Instant Yeast: Can be mixed directly with the dry ingredients and works faster than active dry yeast.
- Fresh Yeast: Used in professional kitchens, it provides a more complex flavor but requires precise measurements.
d. Sugar
- A small amount of sugar feeds the yeast, helping the dough rise properly.
- Optional for those who prefer less sweetness in their dough.
e. Salt
- Enhances the flavor of the dough and controls yeast activity to prevent over-rising.
- Use fine sea salt or kosher salt for even distribution.
f. Olive Oil
- Adds richness and flavor to the dough while also making it more pliable.
- Extra virgin olive oil is a great choice for its robust, fruity flavor.
Optional Enhancements
a. Garlic Powder or Onion Powder
- Incorporate these spices into the dough for an added depth of flavor.
b. Herbs
- Dried oregano, basil, or Italian seasoning can be mixed directly into the flour for a herbaceous twist.
c. Parmesan Cheese
- A sprinkle of grated Parmesan in the dough gives it a subtle, cheesy flavor.
d. Honey or Molasses
- Replace sugar with honey or molasses for a natural sweetness and a touch of complexity.
Ingredient Tips for Success
a. Quality Matters
- Always choose high-quality ingredients, especially flour and olive oil, for the best flavor and texture.
b. Measure Accurately
- Use a kitchen scale for precise measurements, especially for flour and water, to maintain the ideal dough consistency.
c. Know Your Yeast
- Check the expiration date on your yeast to ensure it’s fresh and active.
d. Temperature Awareness
- Cold ingredients can slow down the yeast, so bring everything to room temperature before starting.
Customization Options
- Whole Wheat Dough: Replace part or all of the all-purpose flour with whole wheat flour for a nuttier flavor and higher fiber content.
- Gluten-Free Dough: Use a gluten-free flour blend, but follow a specific recipe to ensure the right texture.
- Herbed Dough: Add a teaspoon of your favorite dried herbs to the dough for a fragrant, flavorful crust.
By understanding the role of each ingredient and making thoughtful choices, you can create a pizza dough that perfectly suits your taste and style. Whether you prefer a soft, chewy crust or a thin, crispy base, starting with high-quality ingredients ensures your pizza will always turn out delicious.
Step-by-Step Process for Making Pizza Dough in a Bread Machine
Making pizza dough in a bread machine is a simple, foolproof way to prepare a perfect base for your pizza. By following these step-by-step instructions, you’ll achieve consistent results every time, with minimal effort and cleanup.
Preparing Your Ingredients
Before starting, ensure you have all the necessary ingredients ready:
- Measure Accurately: Use measuring cups or a kitchen scale for precision, especially with flour and water.
- Check Ingredient Temperatures: Ensure water is lukewarm (about 100°F or 38°C) to activate the yeast without killing it.
- Double-Check Yeast: Make sure your yeast is fresh and not expired for optimal rising.
Adding Ingredients to the Bread Machine
The order of ingredients matters when using a bread machine:
- Start with Liquids: Add water, olive oil, and any other liquid ingredients first. This prevents the dry ingredients from clumping at the bottom.
- Layer Dry Ingredients: Add flour, sugar, salt, and any optional herbs or spices on top of the liquids.
- Yeast Goes Last: Create a small well in the center of the dry ingredients and add the yeast. This keeps it away from the liquids until the mixing process begins.
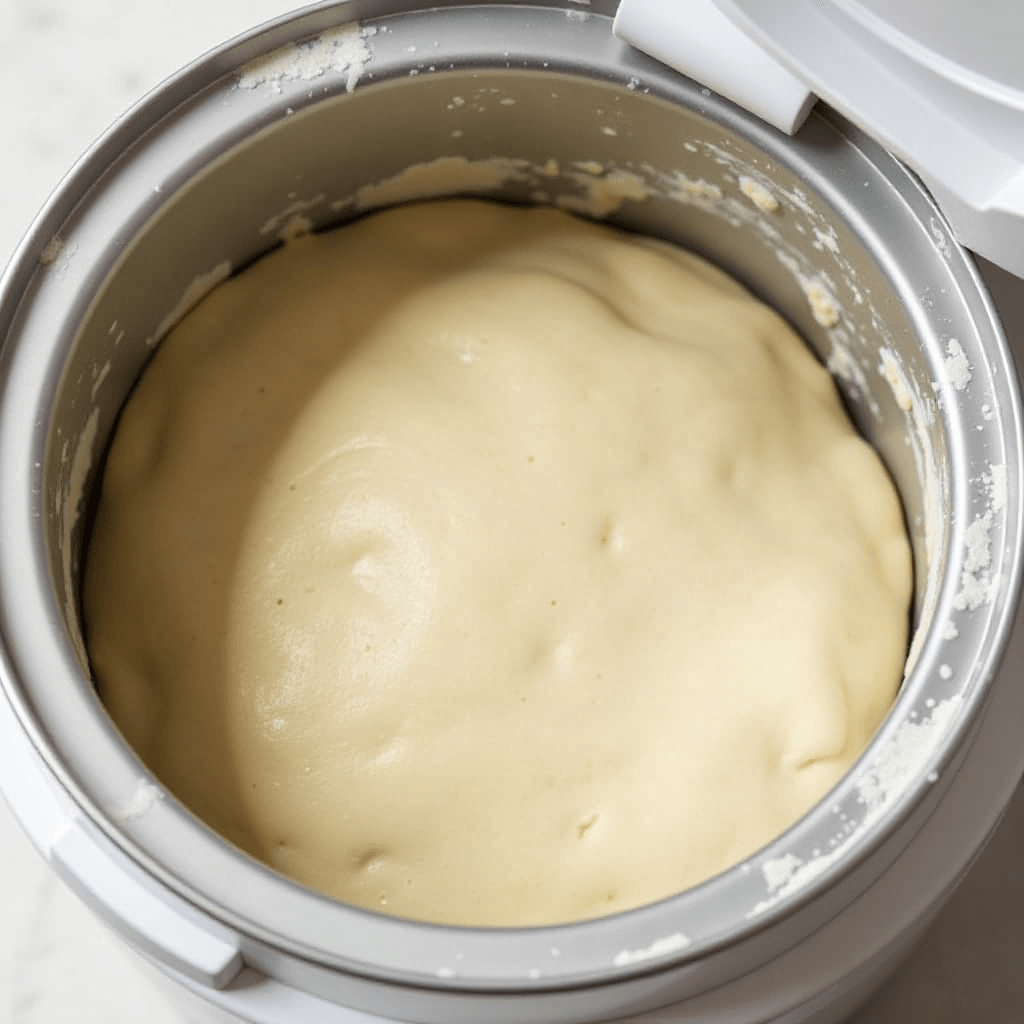
Selecting the Dough Cycle
Set your bread machine to the appropriate cycle for dough preparation:
- Choose the Dough Setting: Most bread machines have a dedicated “dough” cycle that handles mixing, kneading, and the first rise.
- Timing: Dough cycles typically take 1 to 1.5 hours, depending on the machine.
Monitoring the Dough
Although the bread machine automates the process, occasionally checking the dough can help ensure success:
- Check Consistency: After 5–10 minutes of mixing, open the lid and check the dough. It should form a smooth, slightly sticky ball.
- Adjust as Needed:
- If the dough is too dry or crumbly, add a tablespoon of water at a time.
- If the dough is too wet or sticky, add a tablespoon of flour at a time.
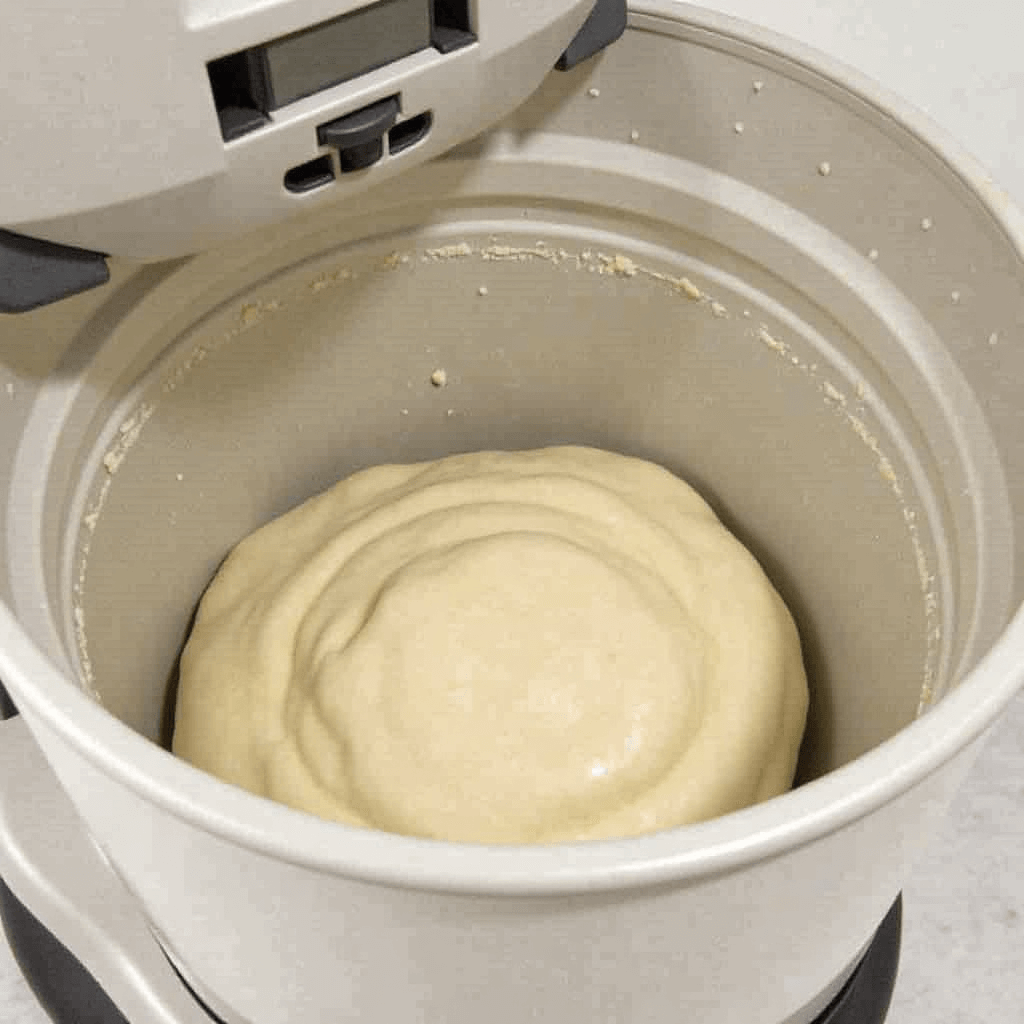
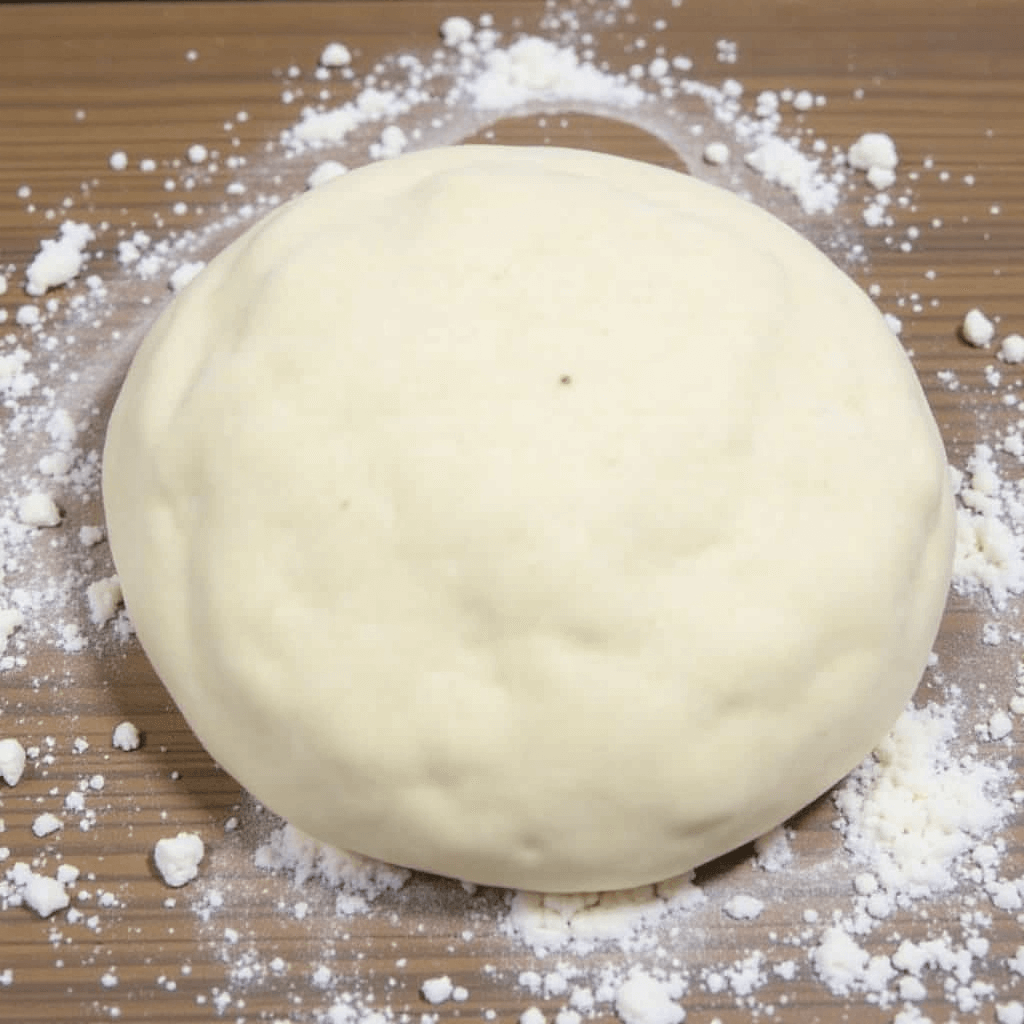
Removing the Dough
When the cycle finishes, remove the dough from the bread machine:
- Lightly Flour Your Hands: This prevents sticking as you handle the dough.
- Transfer to a Floured Surface: Place the dough on a clean, lightly floured work surface.
- Check for Elasticity: Gently stretch the dough; it should feel soft and pliable.
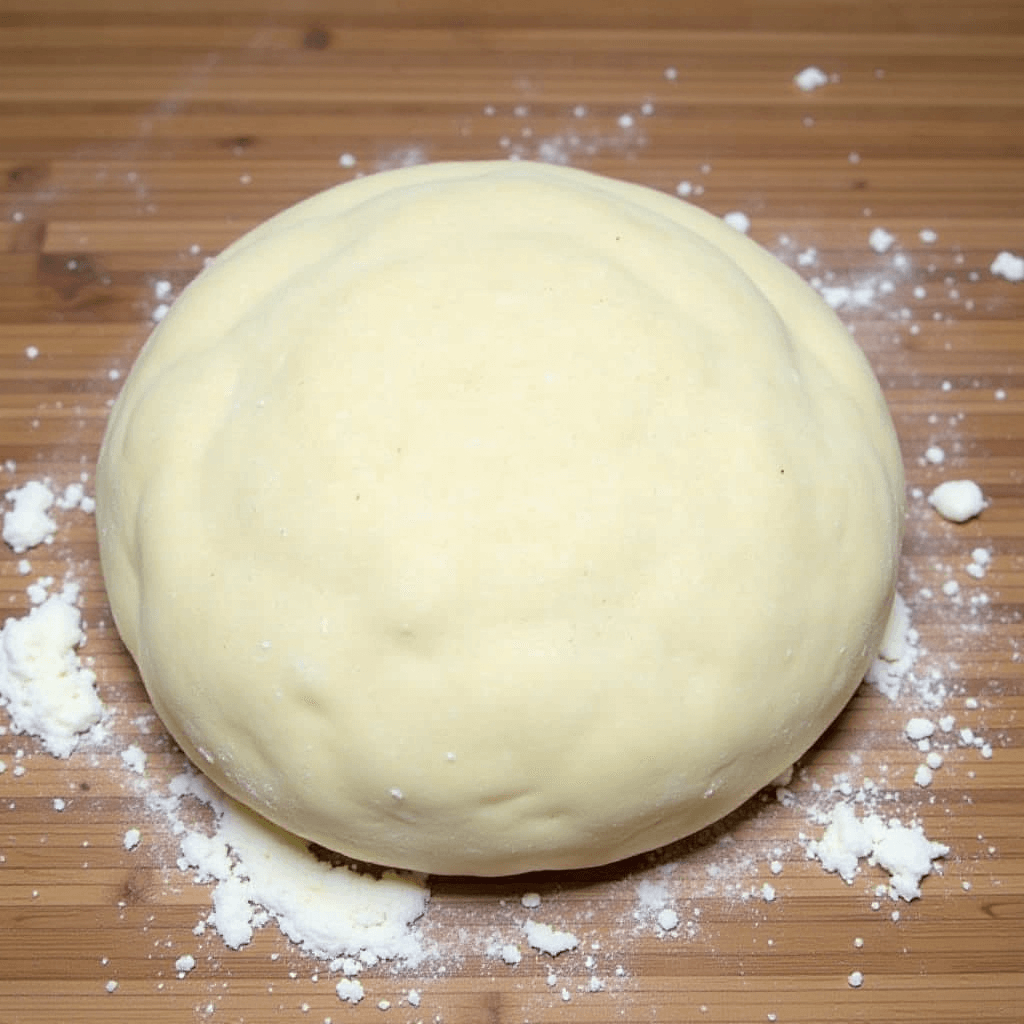
Preparing the Dough for Pizza
Now that the dough is ready, you can shape and prepare it for baking:
- Divide If Necessary: If making multiple pizzas, divide the dough into equal portions.
- Let It Rest: Allow the dough to rest for 10–15 minutes. This relaxes the gluten and makes it easier to roll out.
- Shape the Dough: Use a rolling pin or your hands to shape the dough into your desired thickness and size.
Ready for Toppings and Baking
Your dough is now ready to be turned into a delicious pizza:
- Transfer to a Baking Surface: Place the shaped dough on a baking sheet, pizza stone, or pizza peel.
- Add Toppings: Spread sauce, cheese, and your favorite toppings evenly over the surface.
- Bake to Perfection: Bake in a preheated oven at 450–500°F (230–260°C) until the crust is golden brown and the cheese is bubbly.
Tips for Success
- Experiment with Settings: Different bread machines may have slightly different dough cycles. Experiment to find what works best for your model.
- Store Extra Dough: Unused dough can be stored in an airtight container in the refrigerator for up to 3 days or frozen for up to 3 months.
- Practice Makes Perfect: The more you use your bread machine, the better you’ll understand the ideal consistency and timing for your dough.
By following these steps, your bread machine will become your ultimate pizza dough-making assistant, helping you achieve perfect results with minimal effort!
Tips for Perfect Pizza Crust Every Time
Achieving the perfect pizza crust can transform a good pizza into an exceptional one. Whether you prefer thin and crispy or soft and chewy, these tips will ensure your crust turns out perfect every time you make pizza at home.
Choose the Right Flour
The type of flour you use plays a critical role in the crust’s texture and structure:
- Bread Flour: With higher protein content, bread flour creates a chewy, elastic crust that holds up well to toppings.
- All-Purpose Flour: Offers a softer crust, great for those who prefer a lighter texture.
- 00 Flour: Ideal for Neapolitan-style pizzas, this finely milled Italian flour produces an ultra-thin, crispy crust.
- Whole Wheat Flour: Adds a nutty flavor and boosts nutritional value but can result in a denser crust. Use in combination with white flour for balance.
Master the Dough Consistency
Getting the dough texture right is essential for the perfect crust:
- Hydration Levels: A slightly sticky dough is easier to work with and results in a softer crust.
- Avoid Over-Flouring: Too much flour can make the crust dense and tough.
- Elasticity Check: After kneading, the dough should stretch without tearing, indicating well-developed gluten.
Perfect Your Rising Process
Proper fermentation is crucial for flavor and texture:
- Allow Sufficient Time: Let the dough rise until it doubles in size, usually 1–2 hours, depending on the temperature.
- Use a Warm Environment: A slightly warm, draft-free area helps the yeast work efficiently.
- Cold Fermentation Option: For enhanced flavor, let the dough rest in the refrigerator overnight or up to 48 hours.
Preheat Your Oven and Baking Surface
A hot oven is key to a crispy yet tender crust:
- High Heat: Preheat your oven to 450–500°F (230–260°C) for optimal results.
- Pizza Stone or Steel: Using a preheated pizza stone or steel helps evenly distribute heat, giving the crust a crisp bottom.
- Baking Sheet: If you don’t have a stone, a preheated inverted baking sheet works well too.
Roll or Stretch Dough Properly
The way you shape your dough affects its final texture:
- Gentle Handling: Avoid overworking the dough to maintain its lightness.
- Stretch by Hand: For a rustic look and airy texture, stretch the dough using your hands instead of a rolling pin.
- Uniform Thickness: Ensure the dough is evenly stretched to avoid undercooked or overly thick areas.
Add the Right Amount of Toppings
Overloading your pizza can lead to a soggy crust:
- Keep It Balanced: Use just enough sauce, cheese, and toppings to complement the crust without weighing it down.
- Distribute Evenly: Spread toppings evenly to ensure consistent cooking.
- Pre-Cook Watery Ingredients: Vegetables like mushrooms or tomatoes release moisture during baking, so sauté them beforehand to avoid a soggy base.
Experiment with Baking Techniques
Fine-tune your method for the best results:
- Par-Bake the Crust: For a crispy bottom, bake the crust alone for a few minutes before adding toppings.
- Use Convection Mode: If your oven has a convection setting, it can help achieve an evenly cooked crust.
- Rotate During Baking: Turn the pizza halfway through baking to ensure even cooking.
Customize to Your Taste
Enhance the flavor and texture of your crust with creative touches:
- Flavorful Additions: Add garlic powder, dried herbs, or grated cheese to the dough for a burst of flavor.
- Brush the Edges: A light coating of olive oil or butter on the crust edges enhances both flavor and appearance.
- Crust Variations: Experiment with stuffed crusts, seasoned edges, or even incorporating grains like cornmeal for added texture.
Timing is Everything
Monitor your pizza closely during baking:
- Watch for Doneness: The crust should be golden brown, and the cheese bubbly and slightly browned.
- Avoid Overcooking: Remove the pizza promptly to prevent a dry or overly crispy crust.
Practice and Patience
Perfecting your pizza crust takes time and experimentation:
- Learn from Experience: Each attempt teaches you more about your dough, oven, and personal preferences.
- Adjust for Variables: Factors like humidity, flour type, and oven performance can affect your results : adapt as needed.
- Enjoy the Process: Making pizza at home is as much about the experience as it is about the final product.
By following these tips, you can consistently create pizza crusts that are crispy, chewy, and full of flavor : just the way you like it!
Frequently Asked Questions About Pizza Dough in a Bread Machine
Using a bread machine to make pizza dough is convenient and efficient, but you might still have some questions about the process. Here, we answer the most commonly asked questions to help you perfect your pizza dough every time.
Can I Use Any Bread Machine for Pizza Dough?
Yes, most bread machines are designed to handle pizza dough. However:
- Check the Manual: Your bread machine manual will often include specific instructions or settings for making dough.
- Capacity: Ensure your machine has enough capacity to handle the dough for the size of pizza you want to make. For larger pizzas, consider making the dough in batches.
- Dough Cycle: Look for a dedicated “dough” or “pizza dough” cycle. If unavailable, use the basic dough cycle.
What Type of Flour Should I Use for Bread Machine Pizza Dough?
The type of flour you use can significantly impact the texture of your dough:
- Bread Flour: Best for chewy, elastic crusts due to its high protein content.
- All-Purpose Flour: Suitable for a softer, more tender crust.
- 00 Flour: Ideal for thin, crispy, Neapolitan-style pizza.
- Whole Wheat Flour: Adds flavor and fiber; best used in combination with white flour for a balanced texture.
- Gluten-Free Flour: Use a pre-mixed gluten-free blend and follow a specific recipe to achieve the right texture.
Can I Add Ingredients Like Herbs or Garlic to the Dough?
Absolutely! Adding extra flavors directly to the dough can enhance your pizza:
- Dried Herbs: Oregano, basil, or Italian seasoning work well. Add 1–2 teaspoons to the dry ingredients.
- Garlic Powder or Onion Powder: Add ½–1 teaspoon for subtle savory notes.
- Parmesan Cheese: A tablespoon of grated cheese in the dough can add a touch of umami flavor.
Why Didn’t My Dough Rise Properly in the Bread Machine?
Several factors can affect the rising process:
- Yeast: Ensure you’re using fresh, active yeast. Expired or improperly stored yeast won’t work.
- Water Temperature: Lukewarm water (about 100°F or 38°C) activates the yeast. Water that’s too hot can kill it, and cold water can slow it down.
- Salt and Yeast Contact: Salt can inhibit yeast activity if it comes into direct contact before mixing. Layer ingredients to prevent this.
- Machine Settings: Double-check that you selected the correct dough cycle for your machine.
Can I Refrigerate or Freeze the Dough?
Yes, bread machine pizza dough is very versatile:
- Refrigeration: After the dough cycle, transfer the dough to an airtight container and refrigerate for up to 3 days. Allow it to come to room temperature before shaping.
- Freezing: Divide the dough into portions, wrap tightly in plastic wrap, and place in a freezer-safe bag. Freeze for up to 3 months. Thaw in the refrigerator overnight and bring to room temperature before use.
How Do I Know When the Dough is Ready?
The bread machine’s dough cycle will notify you when it’s finished, but you can also check manually:
- Elasticity Test: Gently stretch the dough; it should feel soft and pliable without tearing.
- Size Check: Properly risen dough should double in size during the cycle.
- Texture: It should be smooth and slightly tacky to the touch, not overly sticky or dry.
Can I Use the Dough for Other Recipes?
Absolutely! Pizza dough made in a bread machine is versatile and can be used for:
- Calzones: Stuff with your favorite fillings and bake until golden.
- Garlic Knots: Shape into knots, brush with garlic butter, and bake.
- Breadsticks: Roll into strips, season, and bake for a delicious side dish.
How Do I Prevent the Dough from Sticking?
Sticky dough can be frustrating, but these tips can help:
- Flour Your Hands: Lightly dust your hands and work surface with flour to prevent sticking.
- Oil the Bread Pan: Before adding ingredients, lightly grease the bread pan with cooking spray or olive oil.
- Use a Dough Scraper: A scraper can help lift sticky dough without tearing it.
What’s the Best Way to Shape Bread Machine Dough for Pizza?
Shaping the dough correctly ensures even cooking:
- Let It Rest: Allow the dough to rest for 10–15 minutes after removing it from the bread machine. This relaxes the gluten and makes it easier to work with.
- Stretch Gently: Use your hands to stretch the dough into your desired size and shape, avoiding a rolling pin if you want a more airy crust.
- Uniform Thickness: Ensure the dough is evenly stretched to prevent undercooked or overly thick areas.
How Can I Make My Pizza Crust Crispy?
A crispy crust is all about technique and tools:
- Preheat Your Oven: Use the highest setting your oven allows, usually around 450–500°F (230–260°C).
- Use a Pizza Stone or Steel: Preheat the stone or steel in the oven for at least 30 minutes before baking.
- Avoid Overloading Toppings: Too many toppings can make the crust soggy.
- Brush with Oil: Lightly coat the edges of the crust with olive oil for a golden, crispy finish.
By addressing these common questions, you’ll be well-prepared to make delicious pizza dough in a bread machine that’s perfect for any occasion. Happy baking!
Conclusion
In conclusion, cooking is not just about following instructions but about creating a connection with the ingredients and the process. Whether you’re a seasoned chef or a beginner, experimenting with new recipes is always a rewarding experience. The key to success in the kitchen lies in understanding flavors, techniques, and the joy of creating something from scratch.
By following this recipe, you’ve not only learned how to make a delicious meal but also gained valuable cooking skills that can be used in many other dishes. Don’t be afraid to make adjustments or try different variations of this recipe to match your preferences or dietary needs. The beauty of cooking is in its versatility, allowing you to be creative and adapt to what’s available in your kitchen.
Remember, the most important ingredient is always a love for food and the experience of sharing meals with those you care about. So, grab your apron, embrace the process, and enjoy the delightful flavors that come from home-cooked meals.